Tenda AC10 Smart Dual-Band Wi-Fi Router setup and configuration using PC/Laptop for your home in simple steps. The wrong configuration can spoil your wifi network performance so always use the professional way to setup your wifi routers.
Tenda AC10 Smart Dual-Band Wi-Fi Router setup & Configuration
The Tenda AC10 models belong to the Tenda AC series WiFi router with multiple AC model number depends on wireless Speeds. Tenda AC10 is a smart and powerful wifi router with 1200Mbps Wi-Fi speeds to provide seamless networks. AC10 best dual band wifi router for home use to get buffering free HD movies and Netflix live streaming. This router comes with 3Giga LAN and 1 Gigabit WAN port with AP, router, Repeater wireless modes. 4 No’s 5 dBi antenna provide the long-range signal for your house to be turned into a smart home. If you are looking for a long-range wireless router for your large size house than AC10 can be the best solution for the larger house. Tenda Ac10 1200Mbps inbuilt with advanced wireless features such as wireless beamforming, anti-interference, and TX power controlling as per the size of the house.
It also provides you security feature with latest wireless security, VPN, Port forwarding and access control list to ensure your home wifi safety. AC1200 Smart Dual-Band Gigabit WiFi Router fully supported cross platform such as Windows, Linux, Mac OSX and Android as well as IOS. In this post, you will get complete setup guide for tenda ac dual band hotspot wifi wan router using the direct internet to configure on WAN port.
Tenda AC10 Dual Band WIFi Router Default Settings
To setup and configure any Wireless router required default factory settings to access it to laptop or mobile. You can also get default router settings to detail back size sticker or user guide comes with wifi routers.
Tenda Default IP Address- 192.168.0.1 or URL-tendawifi. Com
Default username- NA
Password- required to create during the first-time setup
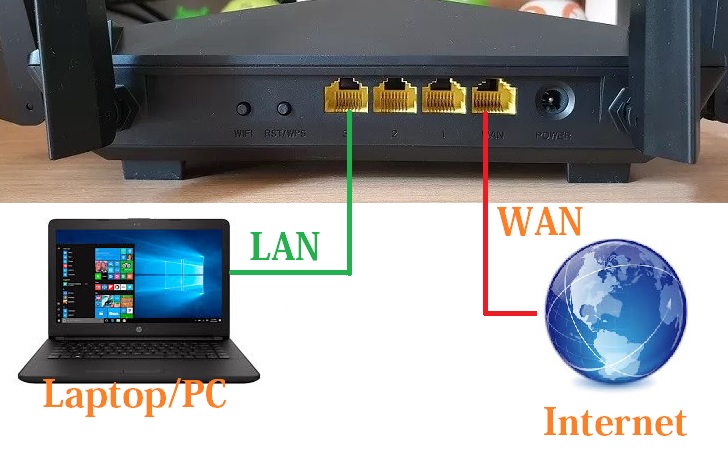
Tenda AC10 Smart Dual-Band Wi-Fi Router setup Connection Diagram
The next step of setup Tenda wifi router is the physical connection of wifi router to PC/Laptop.
Connect WAN port to internet cable coming from your internet providers.
Yellow port (1-3) connect LAN cable to PC/Laptop LAN port.
Configure your Laptop/PC LAN IP with the same series of Tnenda default IP address. EXP- use 192.168.0.10 in PC/Laptop LAN to access Tenda Wi-Fi router.
- Tenda 06 5GHz 11AC 433Mbps Outdoor 10Km Point to Point Configuration
- The Best Way to Boost Your Wi-Fi Speed Up to 10x [Tricks]
- How to Connect Any Wi-Fi without Password from Mobile?
- How to setup QoS to set internet Speed limit for WiFi User
Tenda AC DUAL Band Wireless Router First Time Login
Once physical connection did you can access your Tenda AC wifi router using default IP or URL given on the above steps.
Open the Web browser and type 192.168.0.1 or tendawifi.Com or and hit enter
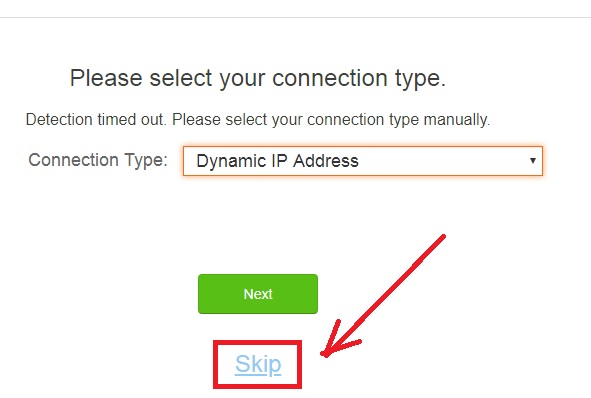
You will get setup wizard just skip the option to enter in web interface settings.
Tenda AC10 Dual Band WiFi Router Login Password set
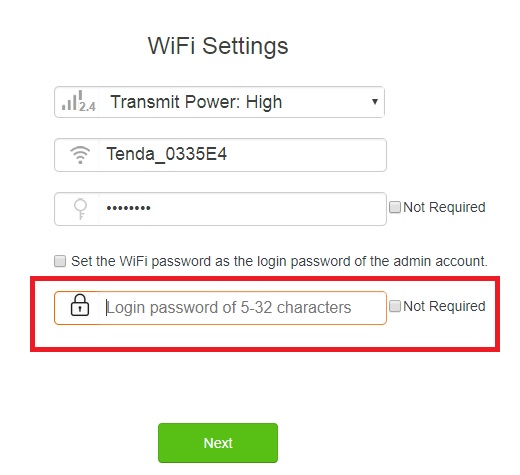
In the next step, you will get an option to configure WiFi password and Login password.
Type the Login password in the box and click the next button to enter in settings.
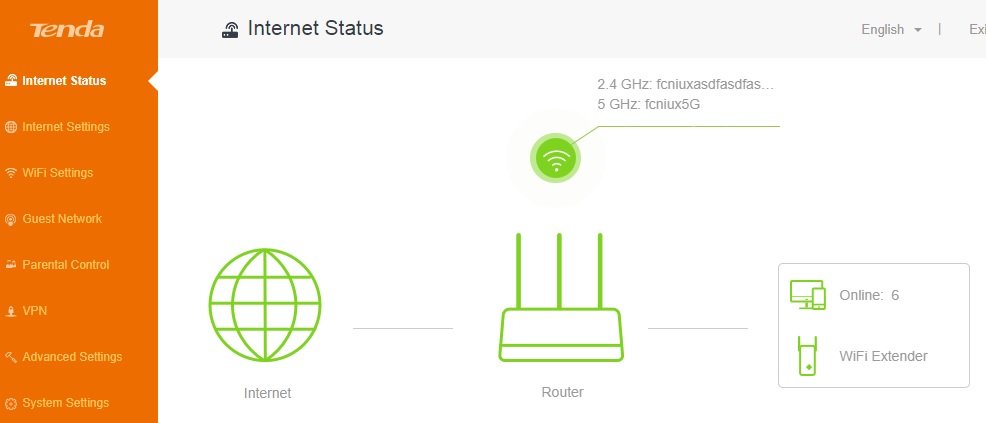
You will land on the status page, where you can see device status as well as connected client list.
After successful login now proceeds to configuration part of tenda Ac router.
Tenda AC10 Dual Band WiFi Router WAN Configuration for Internet
To configuration of Tenda AC10 WiFi router in Router mode WAN internet settings required. To configure WAN settings follow the steps below.
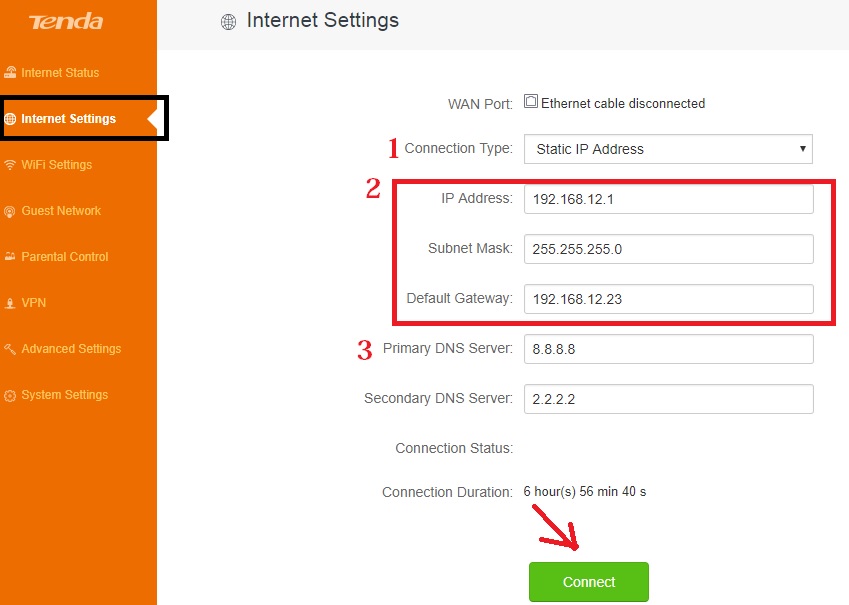
Go to Internet Settings
1: Connection Type- Choose the internet type from PPPoE, Static, DHCP as provided by your ISP.
Here I am using Static IP for my internet so I choose Static IP.
2: IP Address- Internet IP Address provided by your internet providers.
Subnet mask-
Gateway-
3: type the DNS server got from ISP or you can use global DNS server as shown below image.
Click the Connect button to save settings.
Internet Settings did with this steps, now Wireless Configuration.
Tenda AC10 Dual band WiFi Router Wireless SSID and Password Settings
Wireless settings contain the SSID ( WiFI network name), password and wireless channel and other parameters to tune your wifi router perfectly with high performance. To configure Tenda AC10 WiFi name and password go to WiFi Settings tab from the left side menu.
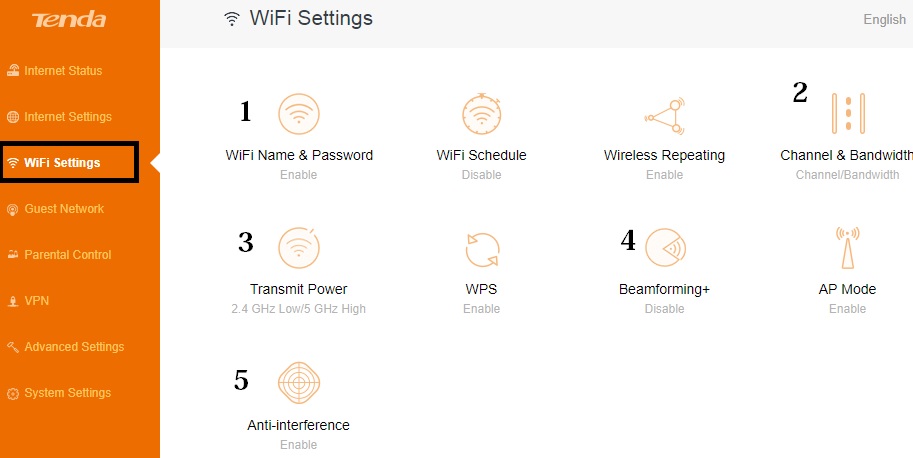
Go to Wi-Fi Settings
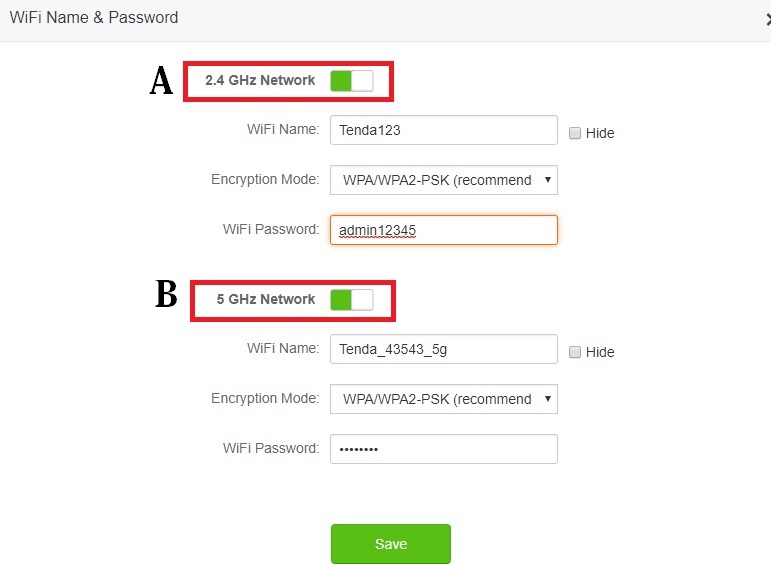
1: WiFi Name & Password
Click the first option to change wifi name and password for your Tenda dual band Wifi routers.
A: 2.4 GHz Network
WiFi Name– type 2.4GHz WiFi name in this box.
Encryption Mode: choose the WPA/WPA2 (recommend).
WiFi Password: type password for 2.4GHz in this box.
B: 5 GHz Network
WiFi Name– type 5 GHz WiFi name in this box.
Encryption Mode: choose the WPA/WPA2 (recommend).
WiFi Password: type password for 2.4GHz in this box.
Click Save button to apply settings
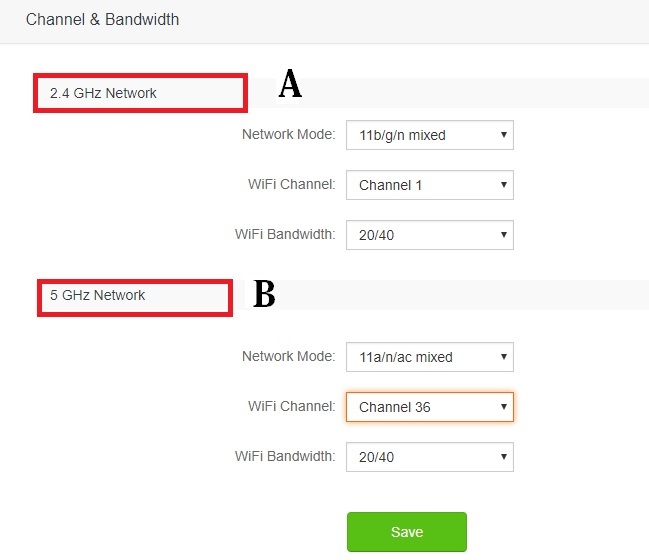
2: Channel & Bandwidth
This is the most important settings to improve your dual band wifi router performance and stability over wifi networks. Selecting the wrong channel can be degraded wifi performance and cause of interference.
A: 2.4 GHz Network
Network Mode: B/G/N mixed (keep this setting)
WiFi Channel- Choose the channel 1,6,11 ( if using single Wi-Fi router use Auto)
WiFi Bandwidth- use 20/40
B: 5 GHz Network
Network Mode: 11a/n/ac (keep this setting)
WiFi Channel- Choose the channel with 2-3 channel spacing (use Auto if the only single device using in the location)
WiFi Bandwidth- use 20/40/80 (use 80 in case required high Wi-Fi speed)
Click Save button to apply settings.
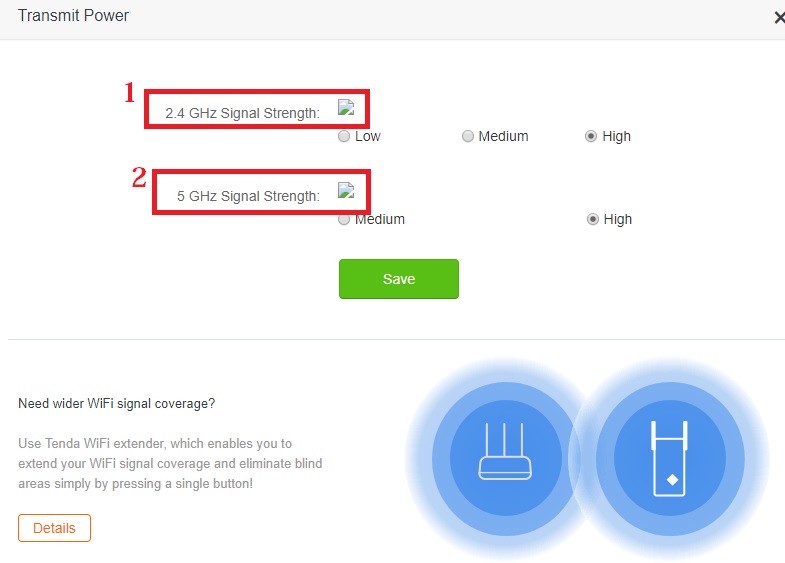
3: Transmit Power
This step is most important part of Tenda AC10 Smart Dual-Band Wi-Fi Router setup for small home. Controlling transmit power is recommended in case your house is medium or small size.
1: control 2.4GHz transmit power in this option. use Low for small home size, Medium, and high depending on your area.
2: 5 GHz signal strength – control power Low, Medium and High as per home size.
Click Save settings.
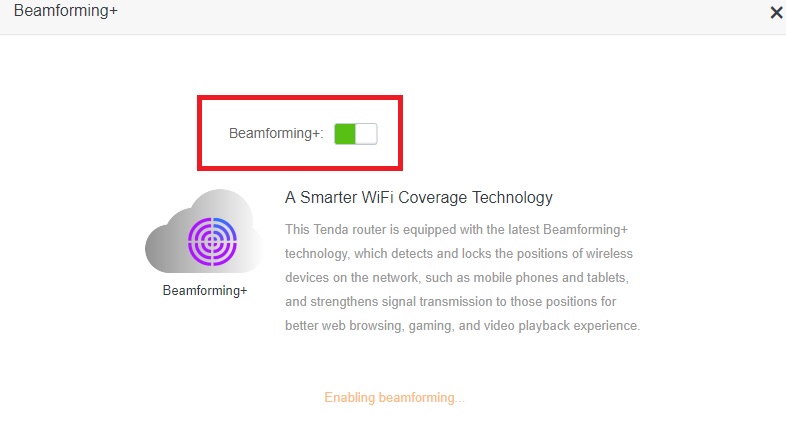
4: Beamforming
Beamforming technology is a smart way to enhance signal coverage toward client location and improve signal strength.
To enable beamforming to switch the button to green.
5: Anti-interference
Anti-inference feature will control the interference issue in your Wifi network due to multiple networks running on the same location.
Click Auto to Enable Anti-interfere.
This is a simple and quick configuration manual for non-technical persons. You can easily double WiFi speed of your Wireless router using proper configuration. check out the Tenda AC10 Smart Dual-Band Wi-Fi Router setup and get the performance double and problem-free wireless networks.
Related Post
- Tenda N301 WiFi Router Repeater Mode Configuration
- 10 best Open Source Operating System Alternative of Windows
- The Best Wireless Mesh Network System Kit for Home
- Download Tenda AC10 Firmware and User guide
The post Tenda AC10 AC1200 Smart Dual-Band Gigabit WiFi Router Setup appeared first on .
from https://ift.tt/2QE7p7s

Tenda Wireless Routers are known for their lightning-fast speeds of up to 1200 Mbps, which is incredible! Tenda Ac1200 Dual Band WiFi Router is an example of a router that provides high-speed Wi-Fi connectivity. Up to 20 wireless devices can be conveniently connected while keeping optimal WiFi speed. The fact that it has four four Omni-directional antennae is also a plus. These antennas assist in maintaining a stable high-speed connection.
ReplyDeleteSome please recommend which product I should pick among the ones listed on this site.
ReplyDeletebest wireless earbuds
Great! your blog is very informative and interesting. If your are looking for these best Tenda Mw6 services. Our company provide a best services in the United Kingdom.
ReplyDelete